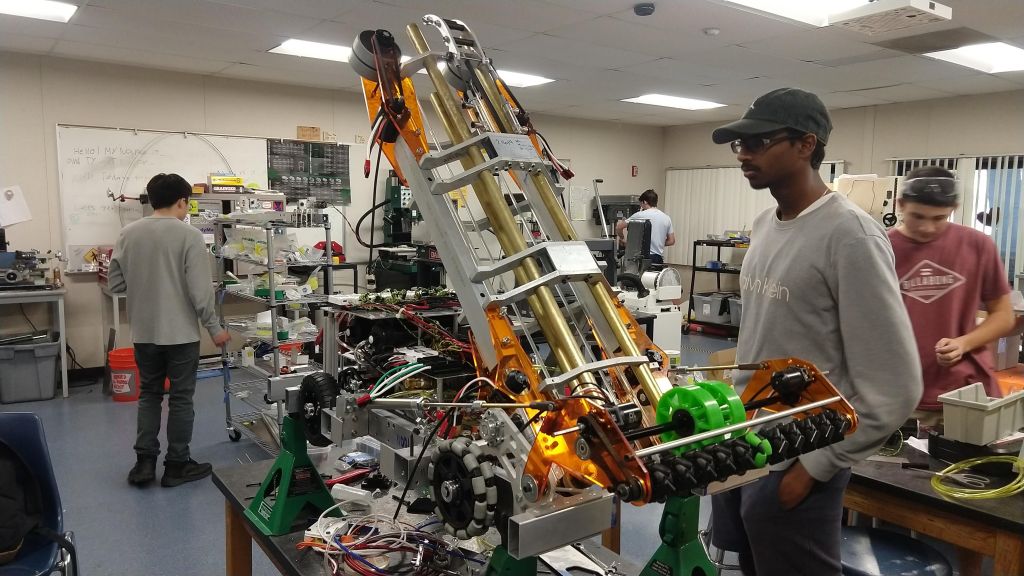
Not much to say for today. We re-did our blue bumpers (which were done yesterday) since we put them a little low before. We also added a small strip of carpet after the color wheel so that the driver could practice driving underneath it smoothly. Then, as software was working on autonomous, we got a little bit of driving practice in. The faster intake speed made things better by at least a factor of ten. We no longer have the problem of balls sometimes getting stuck underneath and now the balls fly into the robot. The macros might need a bit more tuning as we test more but they are pretty good right now. We calibrated the color wheel macro so that we have the capability of doing that as well.
As for autonomous, we now have a working initial mode. For the time being, this will serve its purpose and get us a decent amount of points in the beginning until we figure out a more complex autonomous routine.
Our autonomous routine as of now. This will definitely get better by the time matches start on Saturday.
Note about the above video: You can see that the tube starts up. We normally would start with it in the fully lowest position but we were testing whether it would be able to start with the tube up and we concluded that it indeed can (as long as we power on the robot first and then reset the encoder to 0 at the bottom and then disable the robot).
Sorry for not posting for a couple of days. After the full systems check last Wednesday we spent Thursday and Friday giving software some time to work on their necessary tasks. On Thursday, we were able to attach the bottom limit switch for the tube adjustment mechanism and get it to work. This means that now the tube can be brought all the way to the bottom without the possibility of a mechanical failure due to slamming into the hardstop too hard. This is a first for the team (we haven’t really worked much with limit switches before) and it will definitely make controlling the robot infinitely easier.
On Friday we put a constant force spring on the climber that should have helped us climb faster and more efficiently. However, once we started testing we found that the elevator was unable to lift up and consistently tripped the breaker. At the same time, software tested a couple of smaller things while drive team started practicing a little bit. We were able to temporarily set positions manually by having the operator read the encoder values off of the smart dashboard and use the joystick to move the tube to the right position. We also encountered problems with pneumatic leaks that persisted into Saturday.
On Saturday, we decided to go over to 3647 (Millenium Falcons at Torrey Pines High School) and practice on their full field. As we started driving around and shooting balls, the pneumatic problems became ever more prevalent. It turns out that some connections were simply not sturdy enough and they would pop every once in a while (making a very loud and concerning sound in the process). Nevertheless, Krish and Matt were able to replace those bad connections (along with another one today) and it seems like the pneumatic system should be stable for the time being.
In terms of driving, we very quickly encountered some problems. Most notably our ball pickup was not fast enough (both due to lack of driver practice and due to some problems with intake speed which were also fixed today). Our line-up for the top port (we spent most of the time trying to shoot from the end of the trench) was decent but definitely needs some work. We line-up in two ways: drivetrain and tube. The tube alignment was definitely off because the bottom limit switch broke quickly after we drove into the color wheel with the tube up. Therefore, the operator had to rely on sketchy and not accurate tactics to get the right angle. The other line-up (drivetrain using limelight) also needs to be tuned. Right now it wiggles back and forth between the center position. We can work with what we have but software should hopefully be able to get it to stop in the middle.
Climber side note: Because of the stress caused on the motors when we tried using the constant force spring, we decided to take it off. We tested the climb again and it worked perfectly. However, in our process of testing the spring, we had a small part of the climber break. New parts came today and we were able to quickly repair it (and in the process make sure it doesn’t break next time) so that the climber works. Therefore, we were not able to test out our climb on the swinging scale at 3647’s field. Nevertheless, we will have time during Friday’s practice matches to tune that.
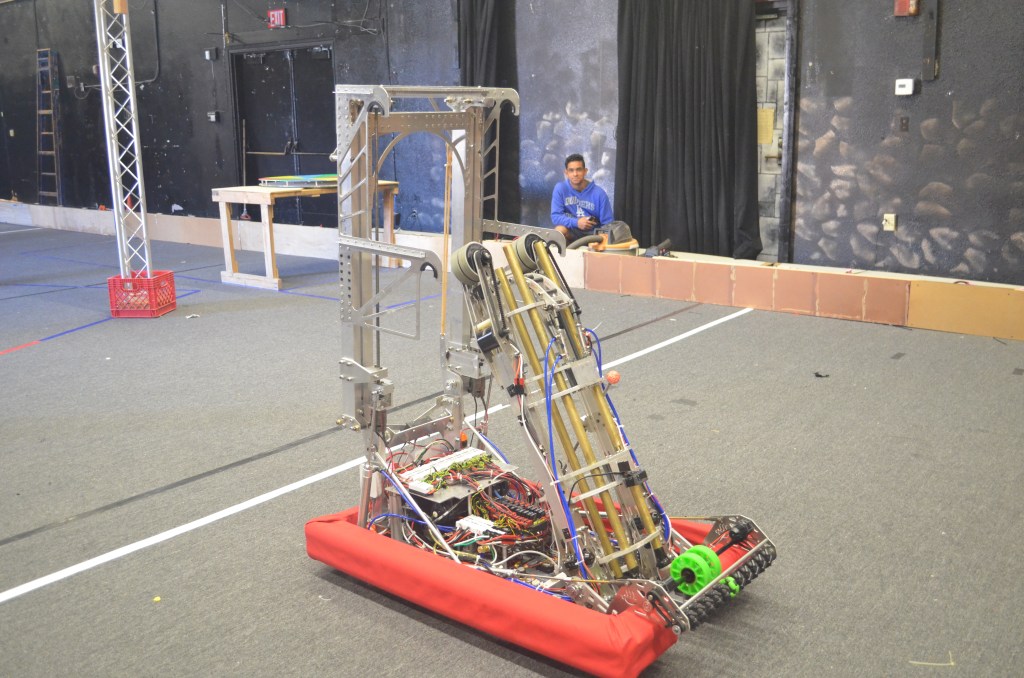
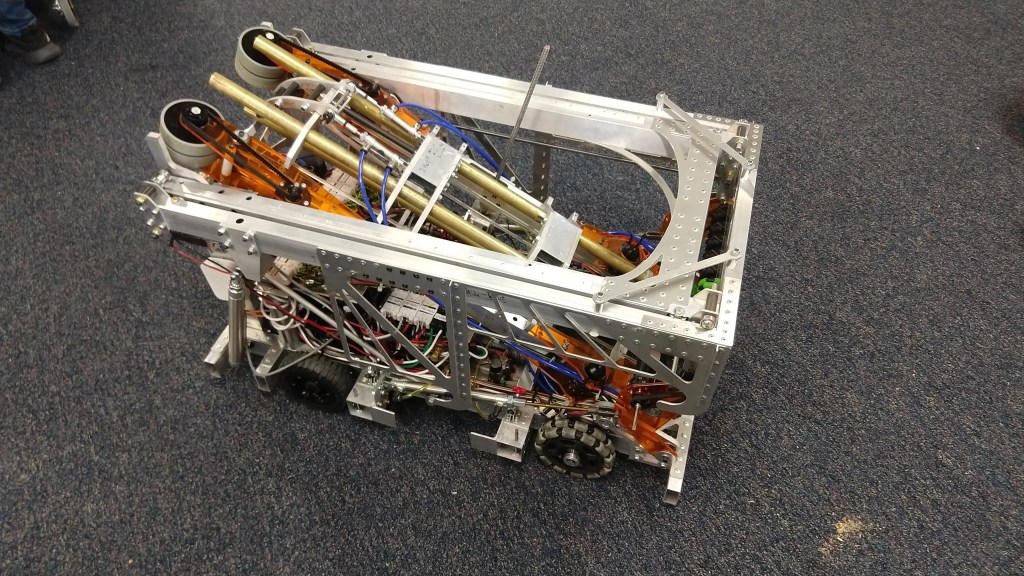
Our robot at 3647’s field.
With the practice on the real field behind us, we were able to use the lessons learned there and fix many problems today. Software got position macros to work so that our tube adjustment should be accurate every single time. Tomorrow they will finish coding a simple autonomous mode (more complicated paths will continue to be worked on while drivers practice) and tuning drivetrain limelight alignment to stop in the middle.
We also got the other set of bumpers done today and bumpers painted on as well. Things overall are looking well. Our fully coded robot should be done tomorrow so that Wednesday is all drive time with some additional drive time and prep on Thursday before we set up. This weekend is our first competition and with all the features and functions of the robot (paired with a great pit crew and drive team) we hope to perform much better than last year and have twice the fun in the process.
Gary doing a fabulous job with the numbers on the bumpers.
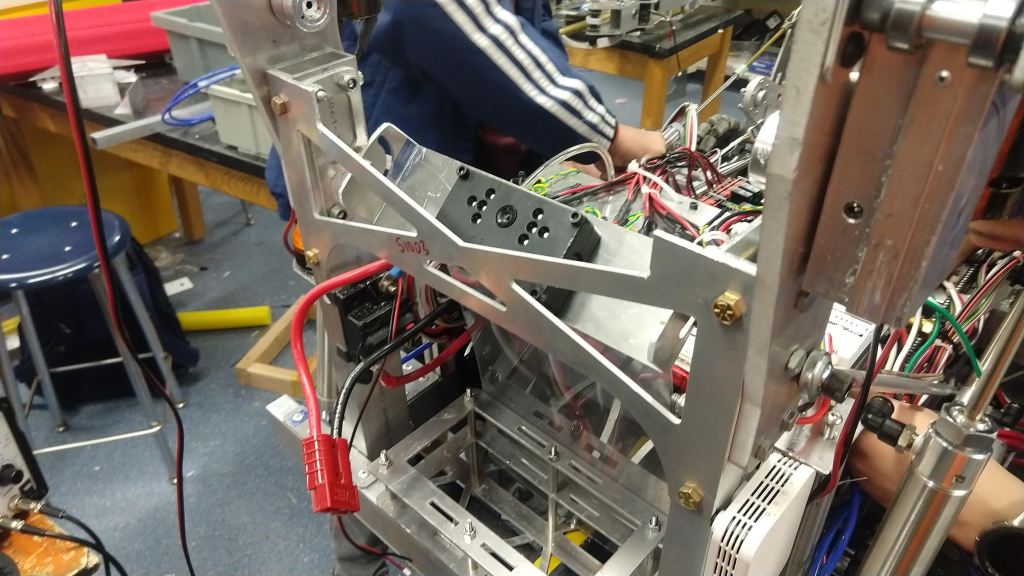
Lots was finished yesterday and today. We continued our “pit stop” yesterday and were able to fully complete the tube and get most of the electrical (except for a few connections) ready. All that was left to be done for today during fourth period (we’ve been working during fourth period at school since a good amount of us have off-roll) was to finish wiring and attach the tube.
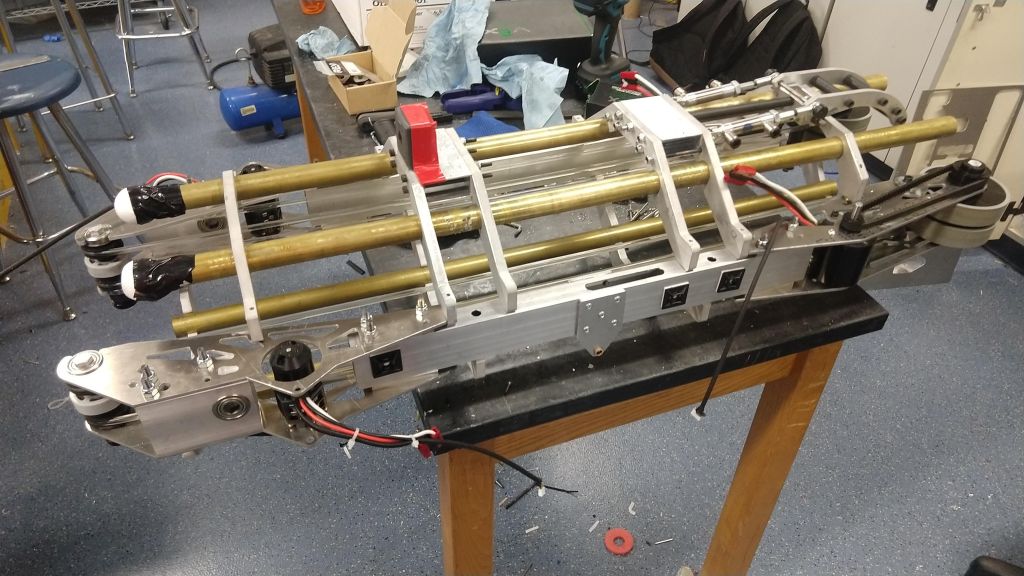
The revised, more metal-ly (yes I still like using that not-a-word) version of the tube.
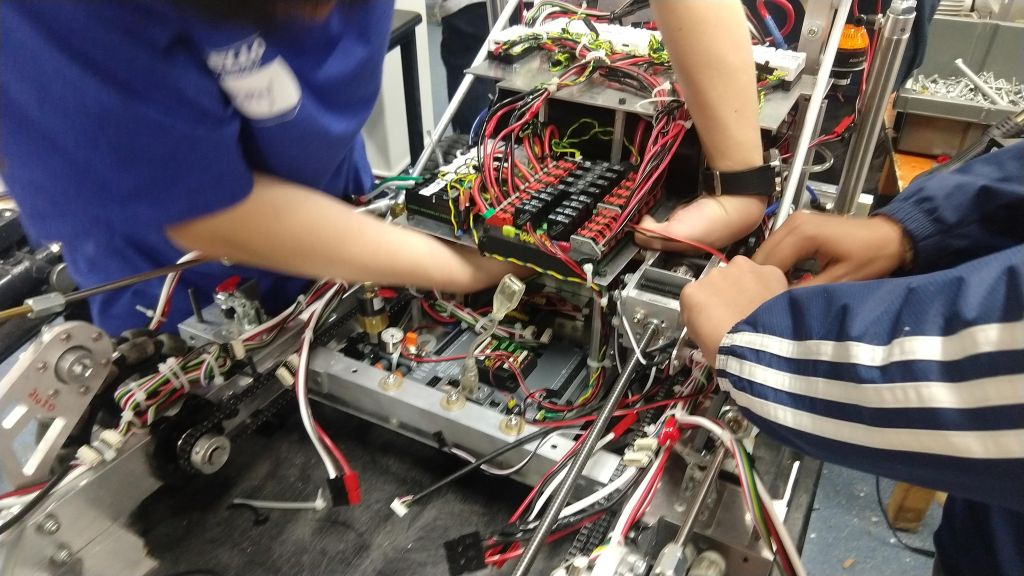
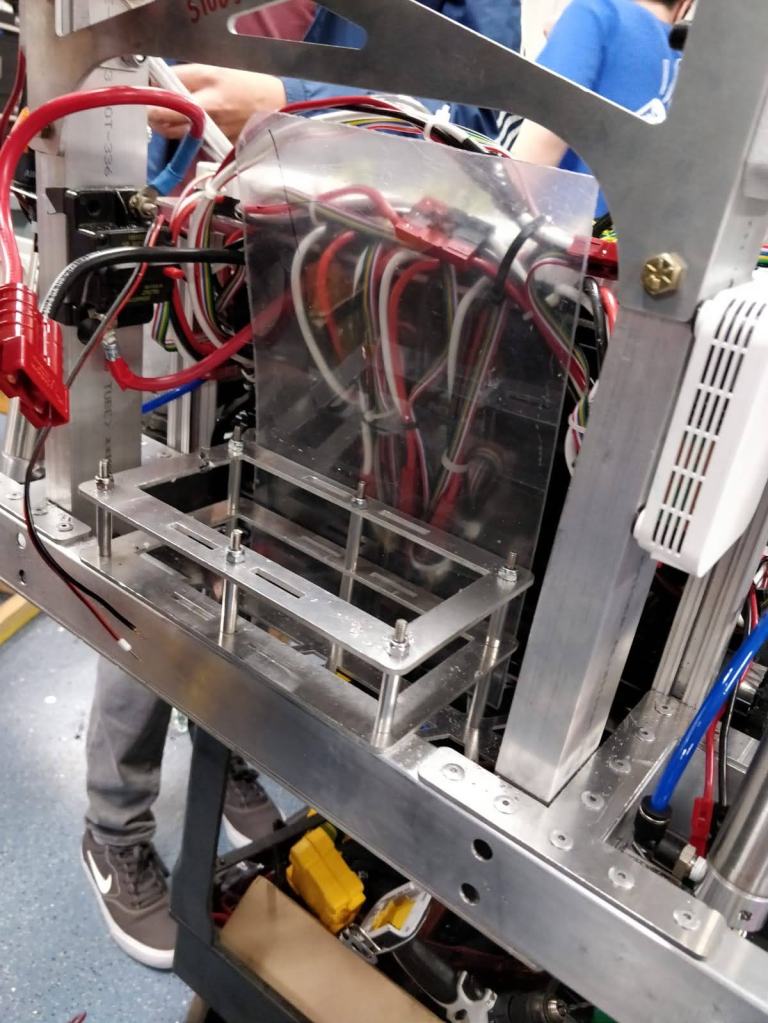
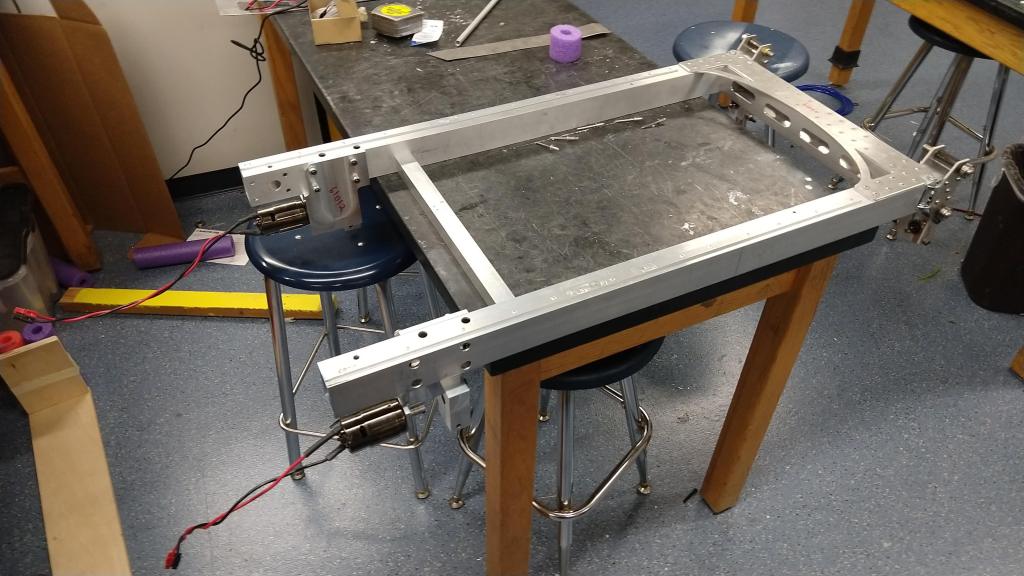
The electrical board being mounted onto the chassis.
A picture of our limelight mount and lexan cover for the wires so that the battery inserts smoothly.
However, what was supposed to be a 15 minute wiring job today during fourth period turned out to be a little longer. Once we had Krish look over a few connections (after school ended), the wiring was finished and the tube was put on (in about 5 minutes). We quickly headed over to testing to make sure everything worked and to hand off to software.
Aaaaaaaaaaaaaand…………………….. things did not go so well. Everything worked perfectly except for the pneumatics. The robot was not able to build pressure in the pneumatic system and therefore the pneumatics couldn’t work. We figured out that a leak must be causing the problem and after a couple hours the problem was located to the manifold. Now I’m not sure what the problem was exactly but some time was spent trying to fix that leak and make sure that it was tight. Only around 7:45 were we able to put everything back onto the robot and get it fully wired. We were able to quickly test and make sure everything worked.
As of now, every element of the robot – both mechanically and electrically – works. In terms of controls, everything runs smoothly and as needed. The additions that will be made tomorrow are some macros for set height/angle positions for the tube and limelight automatic adjustment as well. Once those basic elements (along with a basic autonomous) are finished, we should have everything we need to be a high-performance robot.
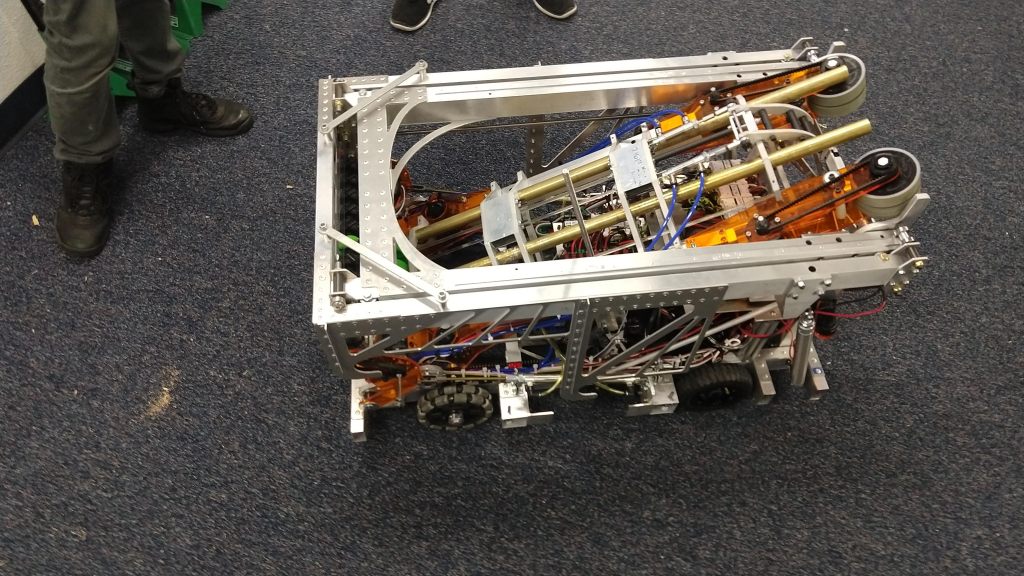
Our full systems check for the robot at the end of the meeting today.
Tomorrow we’ll have some time to drive and software will also get some time to work on macros and controls, autonomous, and limelight tracking.
Yesterday I deliberately didn’t write a blog because there wasn’t much to talk about. Things are overall going according to plan with one small exception: software. So far they have gotten around 7 hours (on Saturday and Sunday) to work on autonomous and our options right do not include pathweaver. Despite this, we hope that with some extra time in a couple of days, software will be able to develop some initial autonomous routines to be ready for competition. All of yesterday was software time and there wasn’t any notable progress (right now we can move forward half a foot and shoot three balls in) and so there isn’t much to say about that.
Today we started our “pit stop.” The plan was to finish Wednesday after school but we seem to be ahead of schedule. Today the robot was disassembled (excluding the climber and drivetrain) in order to change out the acrylic plates we had for prototyping. The electrical board was taken off and a manifold was added so that we can wire the pistons for the climb. We were able to fully re-assemble the intake and start putting the electrical back in place today. In addition, the surgical tubing for the climb was added so that the pistons for the elevator can actually extend it. The tube has four of the eight plates put on and the other four will be completed tomorrow along with its attachment to the robot.
All this means that, if we work as quickly tomorrow as we did today, we should be able to do the work we planned for 8 hours in less than 5 or 6. If so, the extra time will go to software so that they can get some extra controls, macros, and positions coded for teleop and work on autonomous as well. We hope to be fully ready for non-stop (as much as possible of course) drive time before or by the end of Wednesday. That way we should have about a week to get into shape for the competition. With focus, the right strategy, and some upgraded software features that should be implemented on Wednesday, everything seems to be coming together for a great competition.
Now, without further ado, here are some pictures of the robot in its half-completed, but ever more metal-ly (yes I know that’s not a word but hey, it sounds kinda cool) state.
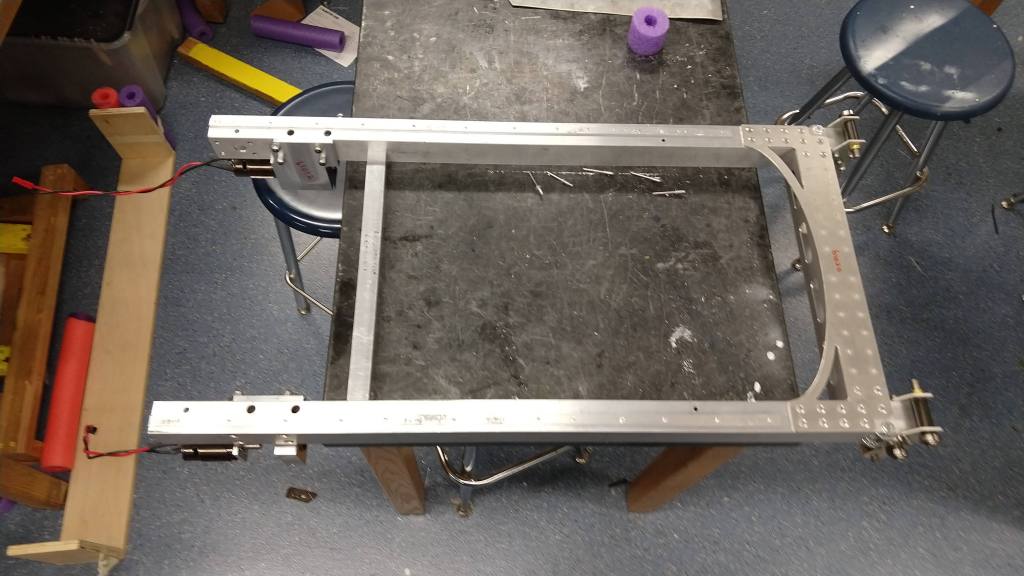
Us working on the robot and the robot without an intake, tube, or any electrical plates.
The tube in its half-completed state. We’re getting there but not quite yet.
The surgical tubing attachment that should help those pistons push up the elevator to vertical.
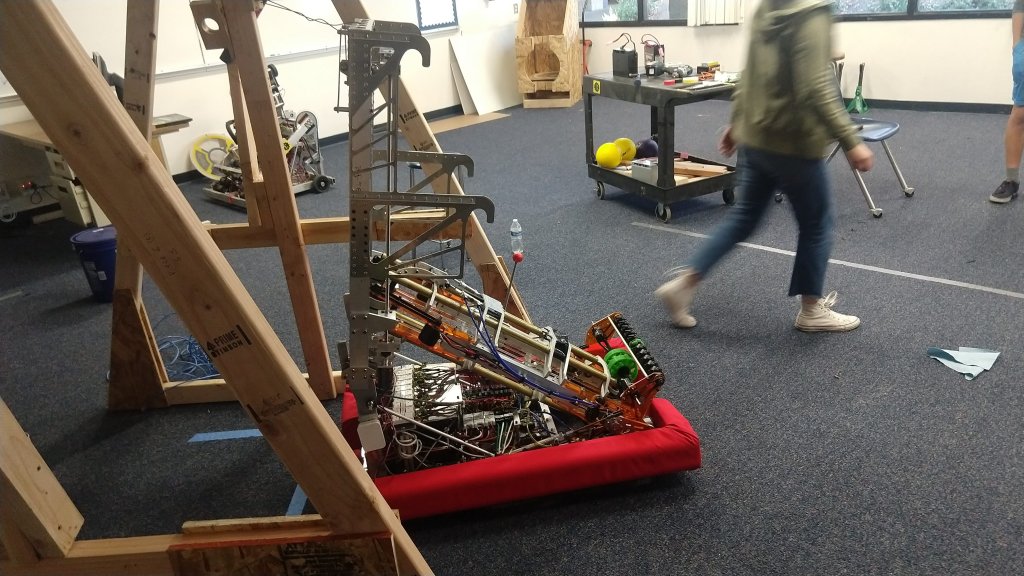
We started off the day with some testing. We rewired the climber so that the motors now get 40 amps and that seemed to do the trick. We were able to quickly climb on both the top and bottom hooks and it looks like the climb should be good.
Our climb working for the first time.
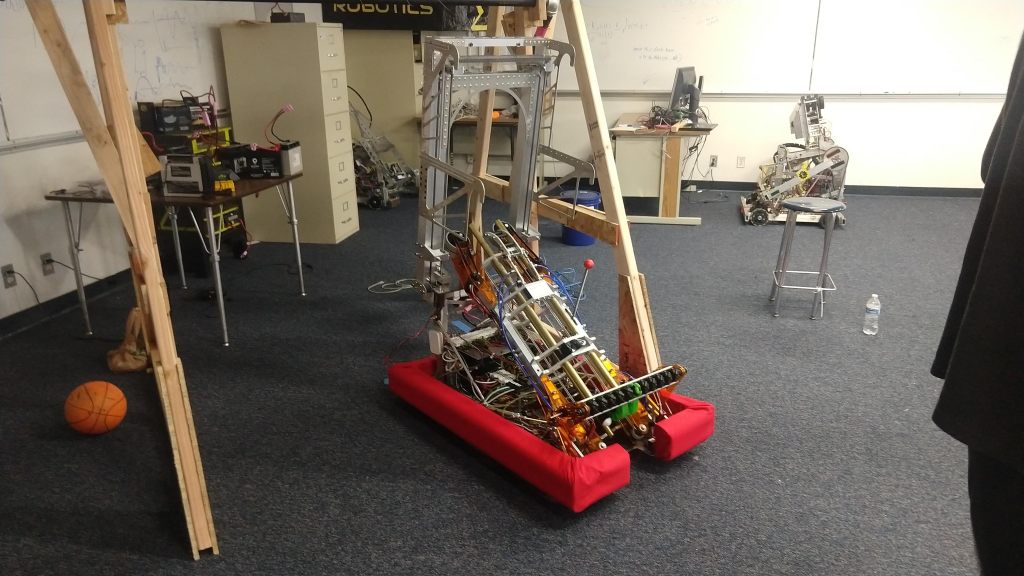
After we finished testing that we worked on the extending pistons that actually bring up the climb to its vertical position. In short, it did not work. As you can see in the video below, the retracting worked fine but the extending just didn’t have enough force to lift the entire climb. We did some quick prototyping with surgical tubing positioned at various spots and a solution was devised that will be implemented once we take apart the tube and rewire the robot (which is set to start Monday after school).
Here you can see the climb pistons when they work and when they don’t.
After that, today was mostly a software day filled with lots of errors and issues and for that there isn’t much I can say. I will try to get software to write some bits for the blog later on so we can document some of these lessons but to be completely honest I don’t understand enough of software and haven’t been involved enough in the process to be able to give some in-depth details on what was done there.
Nevertheless, I can give a brief summary. We had some robot communications and spark max problems some of which have been fixed and others which resolved themselves. Other than that a simple “drive forward” autonomous based purely on encoder ticks worked (today they only tried to work out the drivetrain). But, when software tried to implement pathweaver paths, things did not go well. It kind of just kept driving forward and never stopped. Those are the issues we’re having right now and you can see the general problem in the video below. Software will have time to work tomorrow so those will hopefully get resolved.
The autonomous not quite working the way we want it.
We set up markings on the field for the trench and shield generator. This is kind of how it should look like.
Looking forward, we have our first competition (and second one right after that) in about a week and a half. Software has a substantial amount of time to work on autonomous and limelight tomorrow. Starting Monday after school we’ll get metal plates to replace the plastic ones we have on the tube, shooter, and intake right now. At the same time, the climber additions will be made and the electrical board will be redone to add some more things. We should finish this “pit stop” of sort around Wednesday. After that some more software time will be needed and then we hope to hand off the robot completely to drive team at that point. There should be bout 5-6 days that are all drive time and, if everything goes according to plan, we should be well-prepped for Del Mar.
Sorry for not writing the last couple of days. There hasn’t been much in terms of measurable progress because we have been doing a lot of testing and driving and we did not meet on Wednesday.
Anyway, the entire climber mechanism was prepared on Tuesday (February 18th), while at the same time a new shaft coupler was added for the tube adjustment and we finally got that to work. Software spent some time testing autonomous and limelight drivetrain adjustment – where the drivetrain should be able to automatically adjust to the center of the top port – as well. The values for the adjustment should be almost tuned, which means that for now the drivetrain should be able to adjust automatically to the port. We’ll keep testing tomorrow and hopefully send out a video of that as well. Initially we did have some problems with shooting all five balls consistently (as you can see in the video below) but those were fixed with a slight delay on the pneumatic hook holding the balls back. This gives the shooter wheels enough time to get up to speed.
Here you can see the tube adjustment mechanism working and us shooting from behind the auto line.
After we did some testing out on the field we started putting on the fully assembled climber mechanism. It was attached to a certain extent on Tuesday and its full assembly was continued and finished on Thursday.
How the robot looked at the end of Tuesday (just some small parts to add).
On Thursday the elevator and its pistons were fully attached. We were able to weigh the robot but, since there was nobody from software at the meeting, we were unable to test the climber. Nevertheless, we got some driving in and tested some long shots. For our purposes, the speed and distance of the balls shot seemed enough. We want to be able to shoot from at least the edge of the trench and we should be able to do just that.
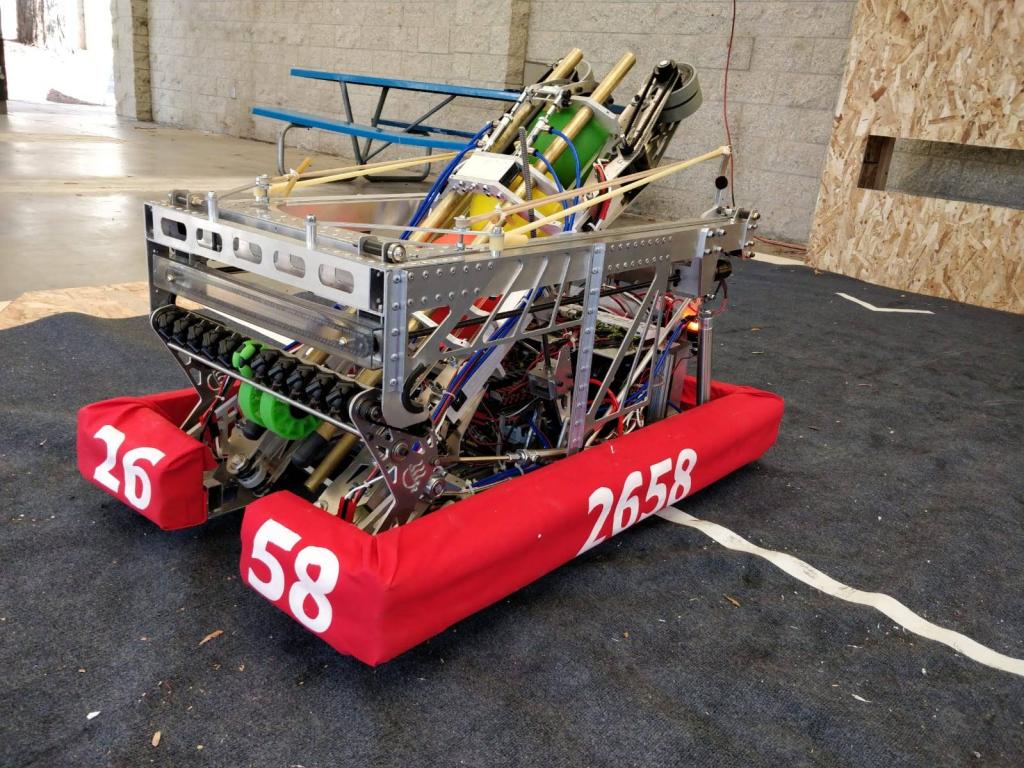
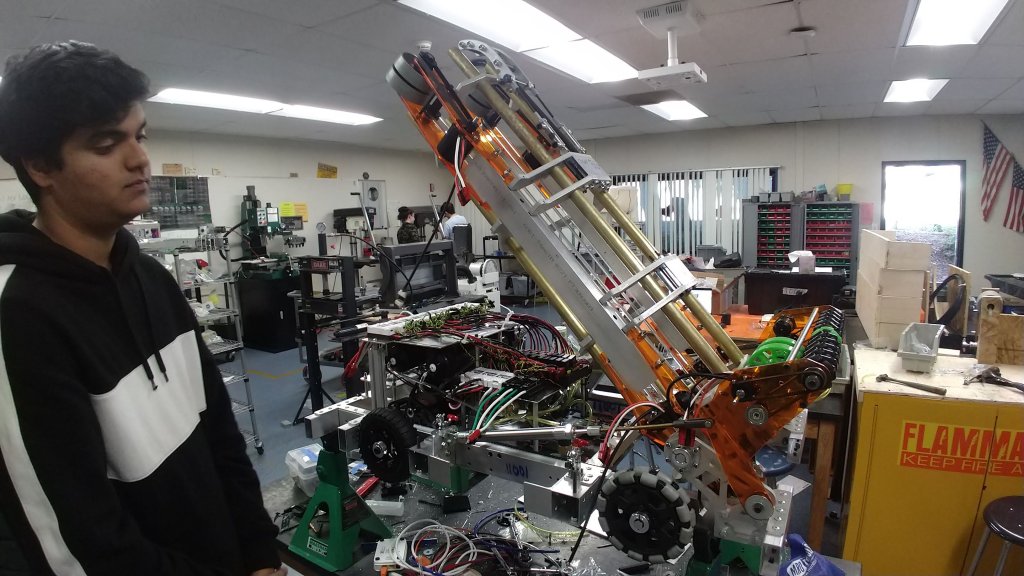
Our fully complete 2020 FRC robot: “Baguette” (technically that’s not the official name but I write the blog and I like it so there is nothing anyone can do).
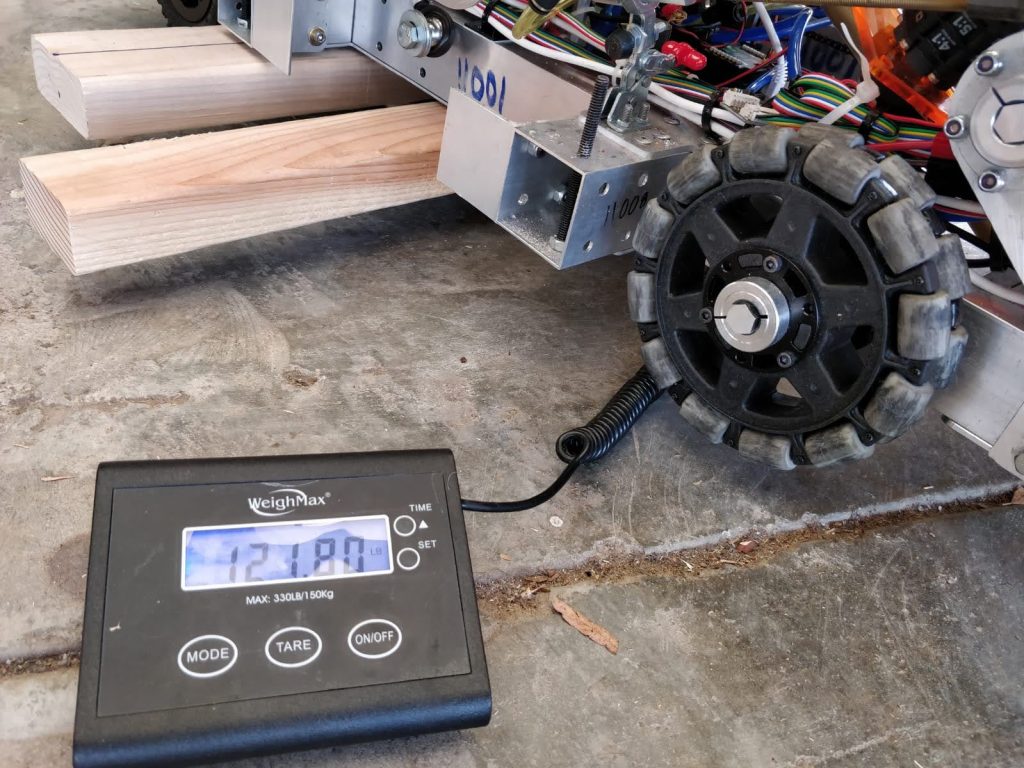
We also weighed “Baguette” (still the unofficial name) and we seem to be in the clear for now.
The weight of the robot right now. The max limit is 125 lbs.
We were also able to put the robot on the climb bar using the hooks but not powering the motors (because we didn’t have software there). We initially tested it out on the level bar and that worked out perfectly. The robot doesn’t swing out much and if the motors are able to lift it, we should be able to have a quick and efficient climb.
A video of putting the robot on the bar for the first time.
We also put the robot on the slanted bar (which is highly unlikely to happen in a real match) and only then did we run into some problems. It slipped a little, but that should be easily fixed with some rubber or some other material that’ll give it some more grip.
The robot sliding down the bar a little when it is at an angle.
Towards the end of the meeting our tube adjustment mechanism’s shaft coupler broke . . . for the second time now. We’ve bought new shaft couplers and some that aren’t flexible (as were the two previous ones) and we hope they will resolve the problem. In any case, because of the fast McMaster shipping, the couplers arrived this morning and we quickly replaced the broken one. At this point the replacement time is less than 10 minutes so we could – if needed – easily replace one in between matches at competition.
Once the coupler was replaced, we spent basically all of today trying to get the climber to work. After a lot of initial software problems with motor controllers and code not working, we were finally able to get all the controls ready to test. Initially, just running the motors on their own, things seemed to work out fine.
An initial test off of the bar. A bit loud but it works.
Then, we tested it on the bar and the problems came rushing. At first (as you can see in the video below) the climber would basically just stop once it started actually lifting the robot. Controls-wise, the joystick on the controller was being pressed fully down and yet it still didn’t work.
Our first ever climb test with the robot.
Then, we brought up the speed on the climber to 97.5% and tried slamming it down quickly instead of steadily moving the climber down and adding power. This seemed to work better, but it still wasn’t close enough.
The robot almost lifted itself off the ground but it wasn’t able to quite get there.
Finally we gave it one more try with the bottom hooks instead of the top ones. For some reason this actually worked even though it shouldn’t have made a difference.
I guess the climb kind of worked on this one.
We kept on testing various scenarios and possible variations but all to no avail. So far we seem to think that it is a problem either with the motors themselves or with the motors not getting the right power. Nevertheless, some mechanical solutions are also being devised so the motors don’t have to work as hard. We’ll continue testing the climber more tomorrow and hope for a miracle in the meantime. There should also be a lot of time for software to work on autonomous so we’ll see how that goes as well.
So far, overall, lots of good things happening as well as some kinks to be worked out. If we are able to get a solid autonomous routine and limelight adjustment going as well as some good driver practice in before the Del Mar Regional, we should be in good shape.
Lots of testing, some problems, lots of good things. We spent the first third of the day today mechanically getting things up to date. The hook stopper for the balls on the end of the tube was moved back. Yesterday we had the problem that the front-most ball was getting burned because the pulleys were touching it. Now, with the hooks back, they work as intended and the balls stay just fine.
We were also able to attach the bottom plate that should have fixed the dead zone and ball jamming problem we had before. Although there doesn’t seem to be a dead zone anymore (which is good – the plate did its job), we occasionally have the ball jamming problem. However, because of the controls, we are able to stop the intake and only run the tube belts, which quickly releases the jam. We’re working out ways to make it seamless.
We also attached bracket to the bumpers and tested them out on the robot. Some small adjustment may need to be done but the brackets seem to be doing their job for now.
Finally, the climber had to be delayed as we still haven’t received the parts we were waiting for. We did, however, attach the hooks onto the climber and all that is left should be the blocks we are waiting for. Those will be machined tomorrow and, because there is a lot of software testing to be done, we’ll probably attach the climber at the end tomorrow and start testing it on Wednesday.
The climber with the hooks on.
After all that was done, we continued testing the robot, getting pneumatics to work, and driving at the end. Overall, everything worked out well. We got the pneumatics to work fine with the controls and the reverse feature (letting the driver switch which side is forward on the robot) was added to the driver controls.
There was, however, one exception to the flawlessness of the initial tests. At first, the tube adjustment that had a mechanical problem yesterday worked perfectly. Mechanically we fixed it in the morning so all the torque was transferred from the motor to the screw. But, for some reason, the motor stopped turning at one point. Then, once the code was reverted back, the tube adjustment was tested and the collar connecting the motor and shaft quickly snapped. A new one should arrive tomorrow and we’ll continue testing but for now the adjustment remains out of service.
Here you can see the broken collar that is supposed to connect the motor and screw.
Here you can see all the systems that worked today.
A slow motion video of the shooter shooting two balls out.
Despite the adjustment problem, we moved the robot to the field and tested. Today we put on a long roll of carpet that we hoped would improve the carpet situation. We are currently having some problems with it staying down and not being moved by the robot but we’ll work on resolving those quickly.
What the field looks like now with the big sheet of carpet. If need be, we can get another sheet.
On the field we tested different things like whether the robot could shoot into the top port when pressed up against the port. We could get 3-4 balls in but never got in all 5. Once we have the tube adjustment working we’ll get the right values so that the tube position for that shot is a macro and we can easily do it every time.
3/5 balls into the top port from up against the wall.
We also wanted to see whether the color wheel could be spun by the shooter wheels. Although we were able to spin it, the line-up was not the easiest and we would have to be very careful. In addition, the wood made a slight cut into the shooter wheel, which is definitely not ideal. We’ll keep working to figure out what the best way is to accomplish the task.
A demonstrative test of how we could spin the color wheel.
Finally, we just spent some time grabbing balls and shooting them into the low port (because we didn’t want to spend the time to move the tube screw manually). This is definitely not representative of the speed we want or will be running at competition, but is definitely a good representation of how we might do things.
Just some example cycles for the low port.
Overall, things are going pretty well. Some problems – like the tube belts sometimes coming off and the balls sometimes jamming between the intake and tube – still need to be addressed, but the overall picture checks out and things are looking good for this robot.
We finally got something to work! Most of today was devoted to testing software and the various functions of the robot. After the firmware was updated for the motor controllers (which took a good amount of time), we were able to use the joystick controls to troubleshoot various electrical and mechanical problems. We first started with testing the drivetrain and although we initially had some electrical problems with one side, they were quickly resolved and the drivetrain worked normally from there on. We also checked and the reverse button works as well. This way there is a toggle to reverse the forward direction for the driver. It should make it easier for the driver to grab balls and shoot since the intake and shooter are on opposite sides of the robot.
The first time the drivetrain worked on the robot.
We continued to test with the tube belts, shooter wheels, and intake. Although some hiccups arose at first (like reversed directions and wrong speeds), we were quickly able to get those things adjusted and have the intake, tube belts, and shooter wheels work just fine. We were not however able to work with the tube adjustment mechanism because of a mechanical issue. Currently the motor for the tube adjustment isn’t transferring torque to the screw and so the actual screw isn’t being turned. A simple tightening of the collar tomorrow morning should fix the problem.
The intake and tube working together to pick up a ball and bring it to the top of the tube.
The tube and shooter working together to bring a ball all the way up and shoot it out (the speed was later increased so the shot isn’t representative of the full speed possible).
That just about sums up the electrical components so far, but the pneumatic components were a different story. We initially had some problems with leakage from the system and couldn’t get the pressure to build all the way. However, once that problem was fixed, the buttons that were supposed to activate the pistons (both for the intake and for the hook on the tube) did not work. Software should work on a fix and the problem will be resolved tomorrow.
In addition to just testing the robot some mechanical work was done as well. Bumper fabric was put on and brackets for attachment and reinforcement will be put on tomorrow morning. We were also able to miraculously find the missing belt and pulley for one side of the tube and all the videos above were of both sides being run. We also were able to CNC the piece that should act as a rest for the ball in between the intake and tube. The piece should supposedly remove the gap and dead zone we had yesterday. However, as we were putting on the piece we noticed that the bottom of the tube hits it at some angles. We should be able to dremel out small pieces tomorrow for the tube to pass while still keeping the main part there for the ball to have constant contact.
Despite all this, main project off the robot was the climb. We were planning on finishing the whole assembly today and getting the final pieces we needed for completion tomorrow. The assembly was finished with the small exception of the hooks (which will be added first thing tomorrow morning) and the two small pieces we were waiting for to come in on Monday. Not only will the full assembly of the climb be complete tomorrow but we will also be attaching and wiring it onto the robot. Once this is done, software will continue testing mechanisms and working on autonomous.
The assembly of the climb as is now and without the hooks added.
Overall, today was a success as most of the mechanisms worked without a hitch (after some adjustments). I’ll end the blog by leaving a nice video of us shooting out all five balls.
What we hope to do many, many times in every match. But faster too.
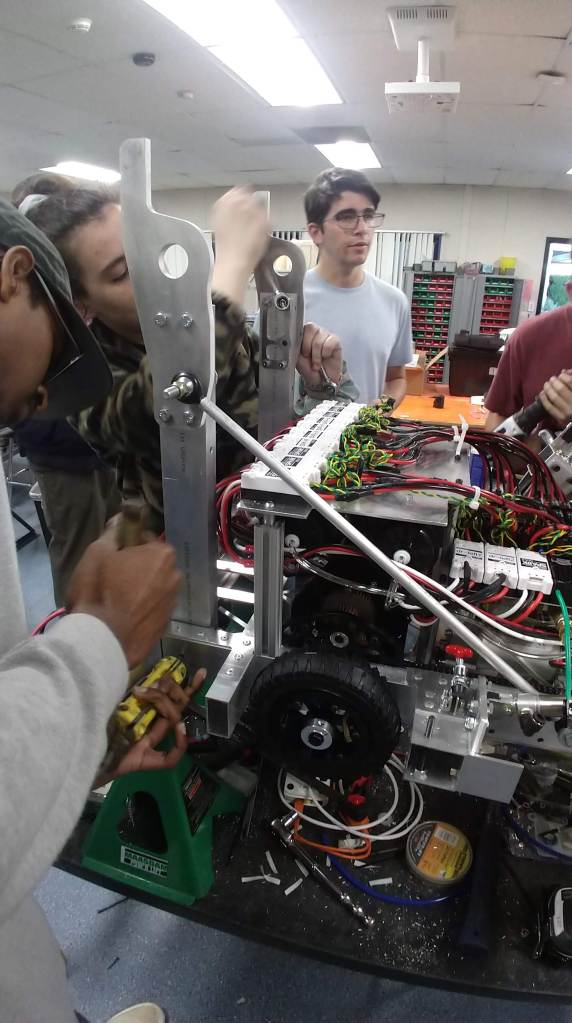
Some hiccups, some progress, but things are looking good. The tube adjustment mechanism was securely attached today (it was almost on yesterday) and most of on-robot time was spent with electrical. We had a shortage of crimps and therefore some soldering had to be done (which took a while).
Slight side note: We had crimps. To my knowledge we actually had enough crimps for all the motors on the robot. However, we did not have enough Anderson crimps. This type of connection has proven most effective for our team and the lack of Anderson crimps in some key locations (such as the intake motors) last year led to several motor failures and mishaps in-match as well as countless other problems with wire detachment. So, this year we are making sure not only that every connection is connected securely with Anderson connectors but also that there are zip ties on the connectors to ensure they don’t fail either (as it is still possible but unlikely).
So, because we were short on Anderson crimps, we had to spend a couple of hours soldering some connections. We actually took some spare crimps from practice tests and just soldered them onto the ends of the wires we needed to crimp. This way we are still able to have the versatility and modularity of the crimps. Because of this our initial deadline of 1 pm was far overshot and we actually finished wiring the robot around 5. Despite the delay, the connections are solid and secure and the various electrical problems we had last year don’t look like they’ll arise again.
The first time we got the robot powered. There are two controllers with errors because we still haven’t attached the climber. All else is good.
The robot on the floor without bumpers or the elevator.
The robot on the field with bumpers (no fabric or brackets on them yet but will be quickly added).
We were unable to test the robot code after the robot was ready to go but we were nevertheless able to test out intake and tube geometry. We wanted to see a couple things. One, does the geometry for the intake work out and do the mecanum wheels actually funnel the ball in? Two, does the ball easily transfer from the intake to the tube? The first question was answered with a resounding yes as we saw that the balls could be thrown to basically the edge of the intake and they still got funneled to the middle. It works perfectly. Things might change a bit once we actually start driving but it seems good for now.
Here you can see the smooth transfer of the ball to the tube and the funneling of it through the intake.
The second question’s answer is not as clear. We were sometimes able to get clear and flawless transfer between the intake and tube (as you can see in the video above) and sometimes not. Sometimes the ball would get stuck on the tubes at the bottom of the tube (as you can see in the video below) and sometimes it would stay in the little bit of a dead zone we have right now. We do have to add a plate under the chassis at that spot and it should hopefully help but we won’t know until we actually do it. In any case we’ll figure out a way to get it seamless. At the very least, the intake does its job and we will have a good amount of room for error on the driver’s part when picking up balls.
An example of how the ball gets stuck sometimes in the hand-off from the intake to the tube.
We also tested the clearance underneath the color wheel with the completed robot. If we make sure to stay down (ie. don’t do a wheelie) and keep the tube stowed low, we should have enough clearance underneath to pass through.
Here you can see how much space we have above the robot once the tube is about at its lowest position.
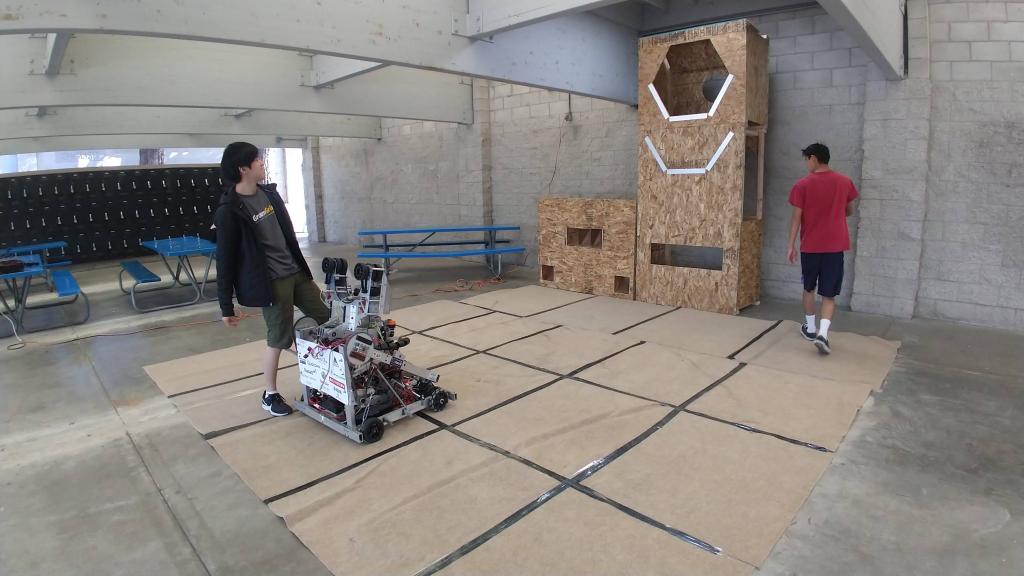
While this was going on, we also had some people work on setting up a field for us to use. We have the cleared out area near the lockers to use (which is protected from rain) to set up the tall port. We might have to bring out the climb at some point as well but we’ll see if it is necessary (it will require disassembly to move out). We’re also working on getting some new carpet out there for better testing.
The field set up outside.
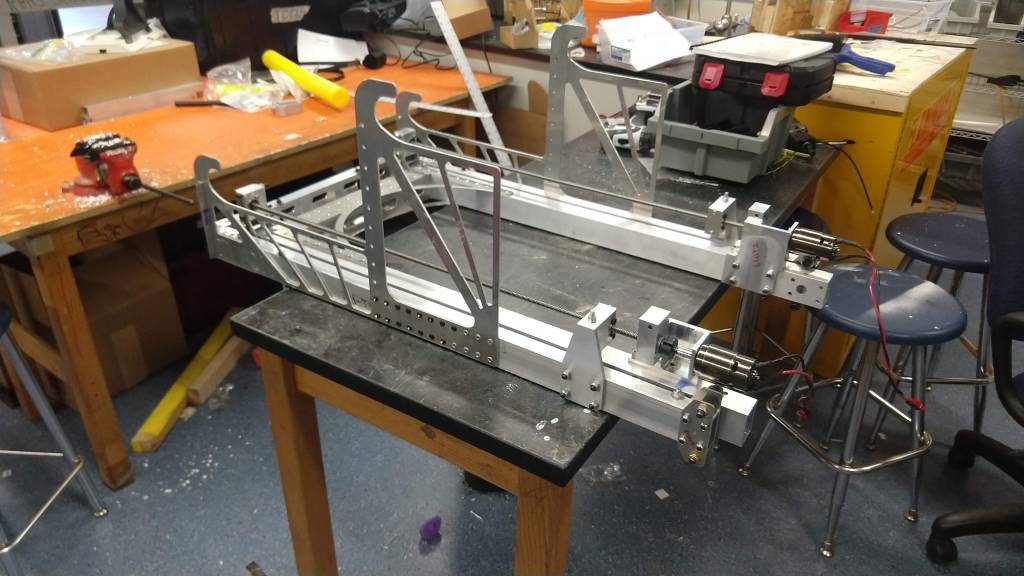
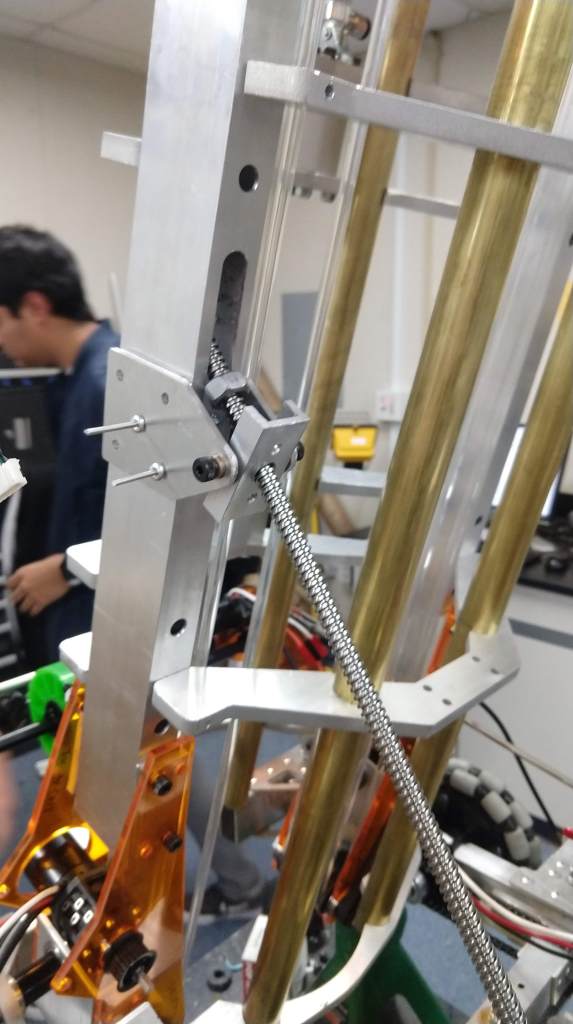
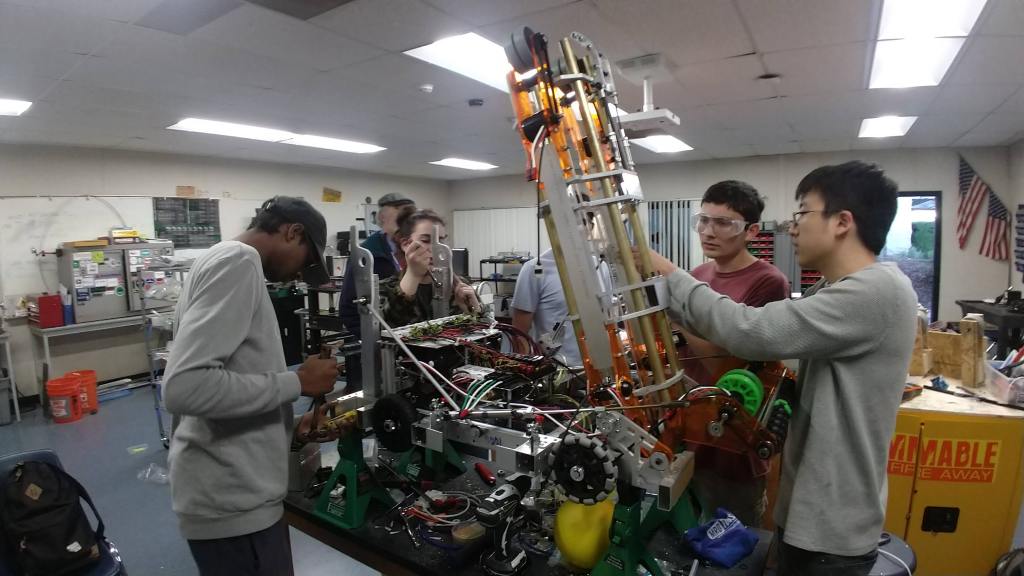
While the robot was being wired, build finished up attaching the back plate for the upright beams for the climb. The first stage of the climb also had a good amount of progress. It seems complete for now (although I might be wrong and there might be a couple small things to add) and all that should be left is adding the second stage. Once we do that and get it all ready for the robot, we should be able to quickly put it on and wire (should hopefully take less than an hour).
The first stage of the climber as is now (still a couple things to add but almost done).
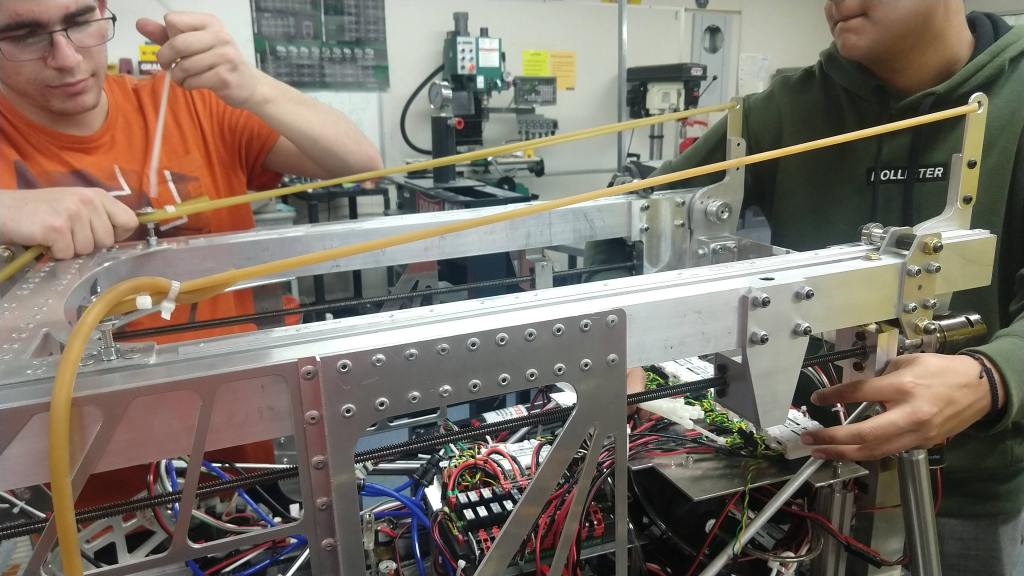
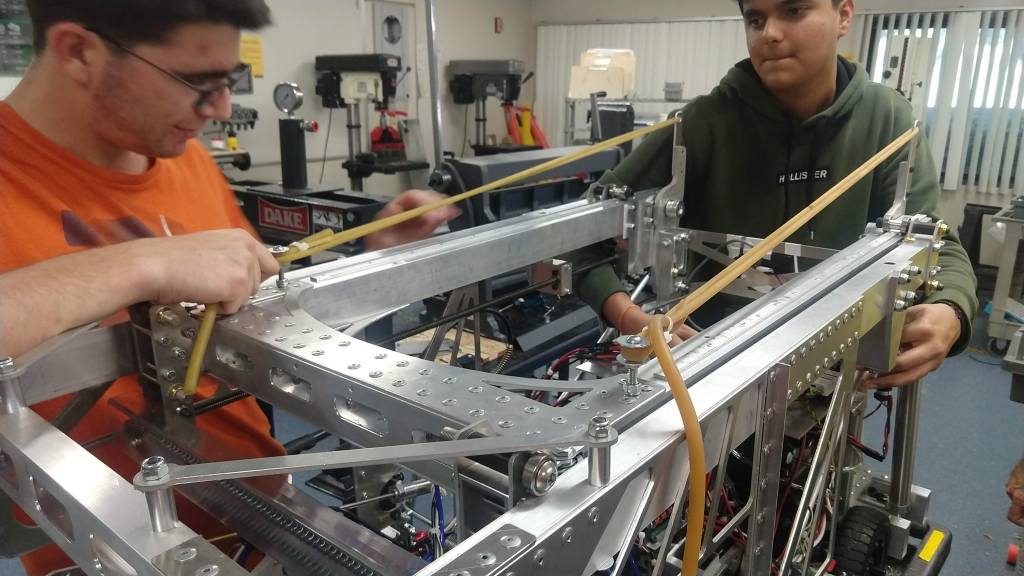
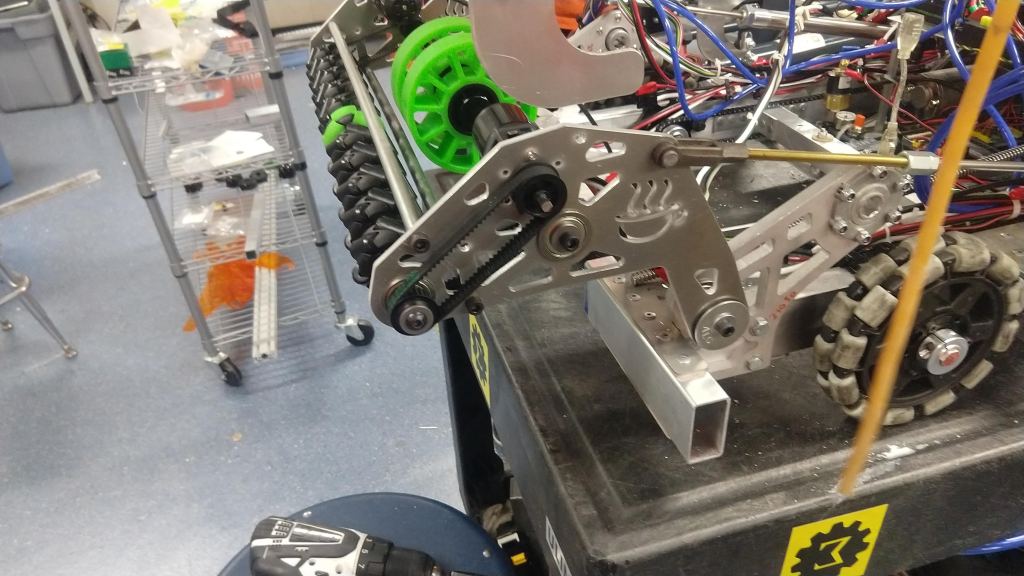
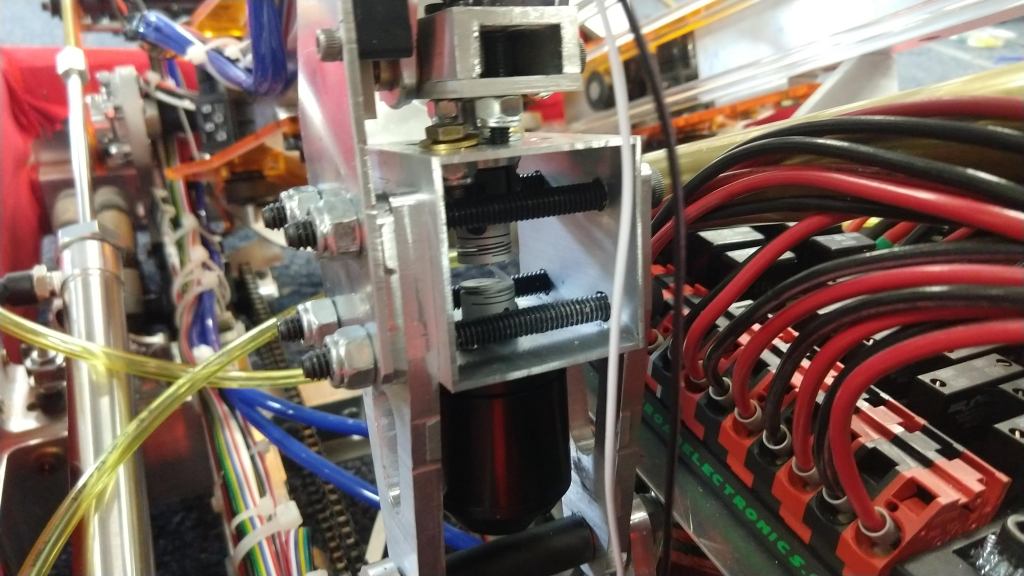
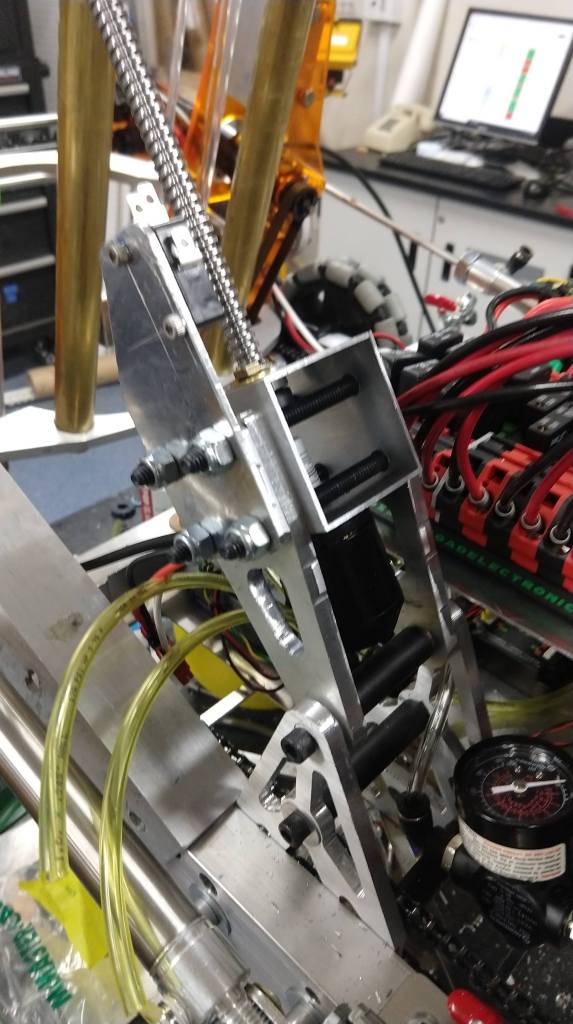
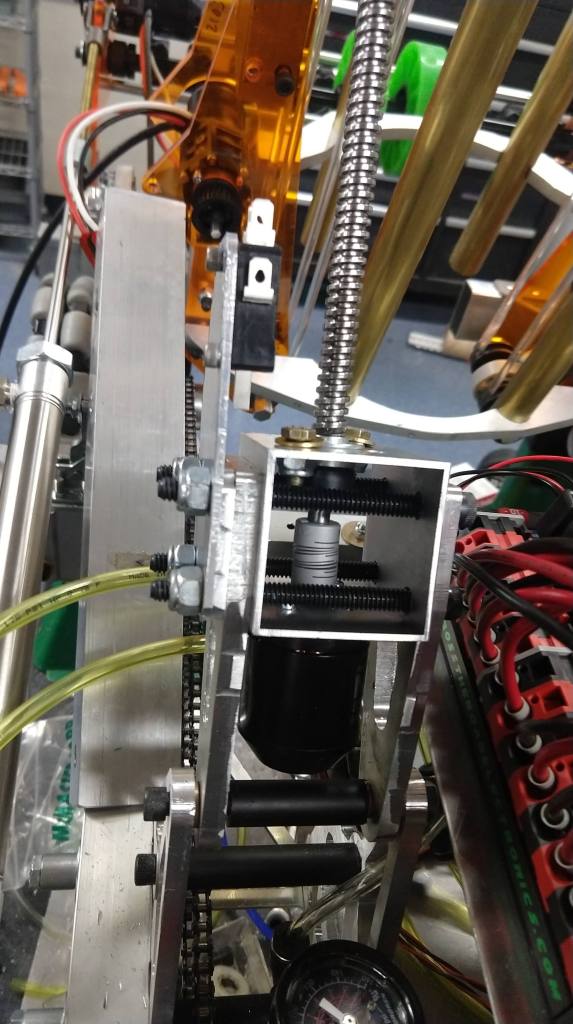
We’re almost done. Today we were able to finally finish up the assembly of the tube and intake as well as get started on some part of the climber (in addition to what is already done). The tube adjustment mechanism was put together and then threaded through the nut on the tube. This will allow us to adjust the tube up and down for shooting balls into the lower and upper port.
Here you can see the adjustment mechanism in pretty good detail. It’s tight with the electrical and pneumatic systems but it works out just fine.
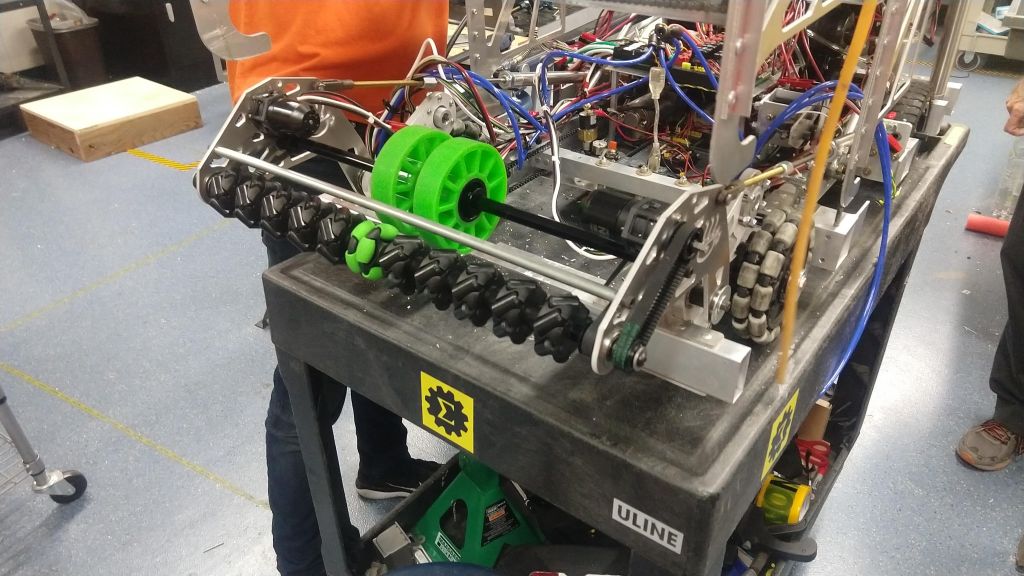
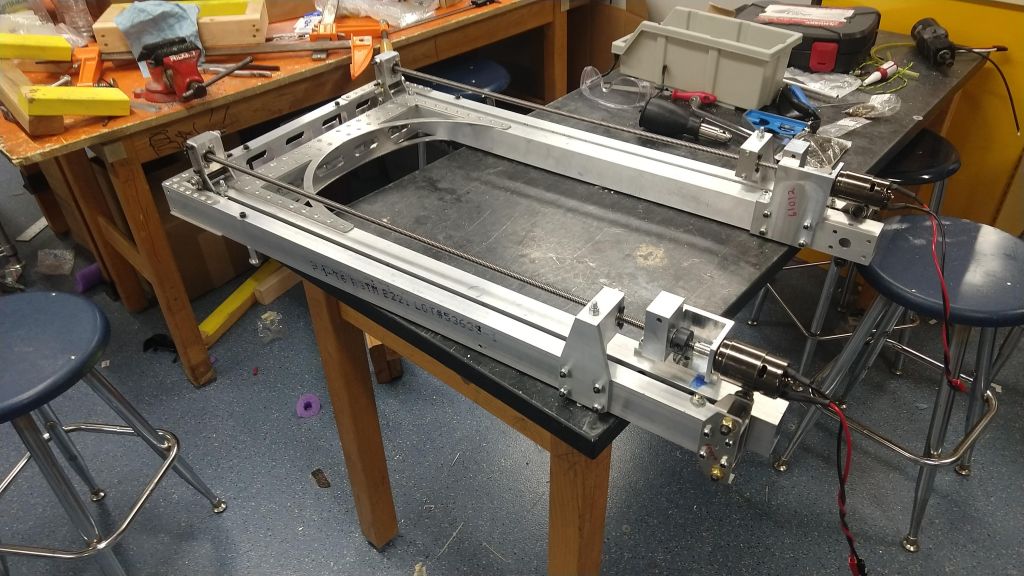
The shafts for the tube were also put in place today. This will allow the whole pivot to pivot near the intake side of the robot. The range of motion so far looks good and just as planned in the CAD. We might however have some slight problems with the tube going down and hitting the electrical plate but those will be resolved quickly if necessary. We also had some problems finding a belt and pulley that we thought had been ordered and received. We will keep looking but for now the tube will have to run the balls from one side (it will work for one ball and hence testing, but if we try to put multiple in they will jam).
A view of the tube and its pivot (on the right and left). Those green wheels are the second stage of the intake.
We were also able to attach the back tubing that holds up the climber. At this point once the tube and intake are wired (which will hopefully be within the first hour of tomorrow’s meeting) we will hand it off to software to start testing. Climber weight will be simulated and in the meantime we will begin assembling both stages of the climb. One piece is holding us back but that should be done by Monday. In the meantime we hope to at least assemble the whole climber and, if we figure out a way, maybe even try to make that piece in house. This way, software will have a minimum of five hours tomorrow to work on autonomous modes and to iron out controls for the robot while build finishes up the final mechanism. Once it is done, assembly should be a simple shaft and collar onto the robot (and wiring of course). Our hopes are that – excluding the piece we are waiting on – the elevator is finished tomorrow. Software wise, we hope the controls work and that we can have at least one successful autonomous mode of 3 balls in the top port.
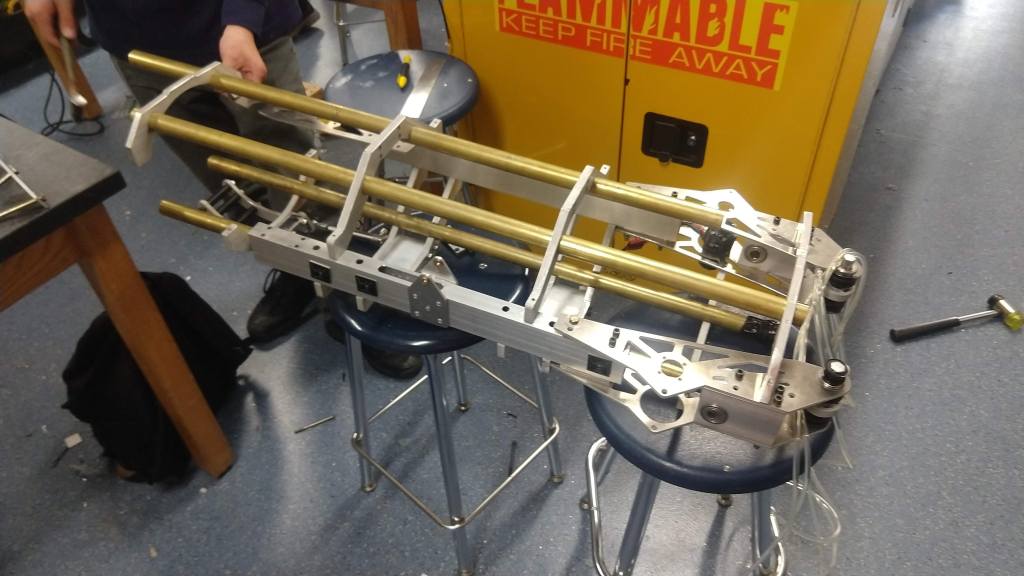
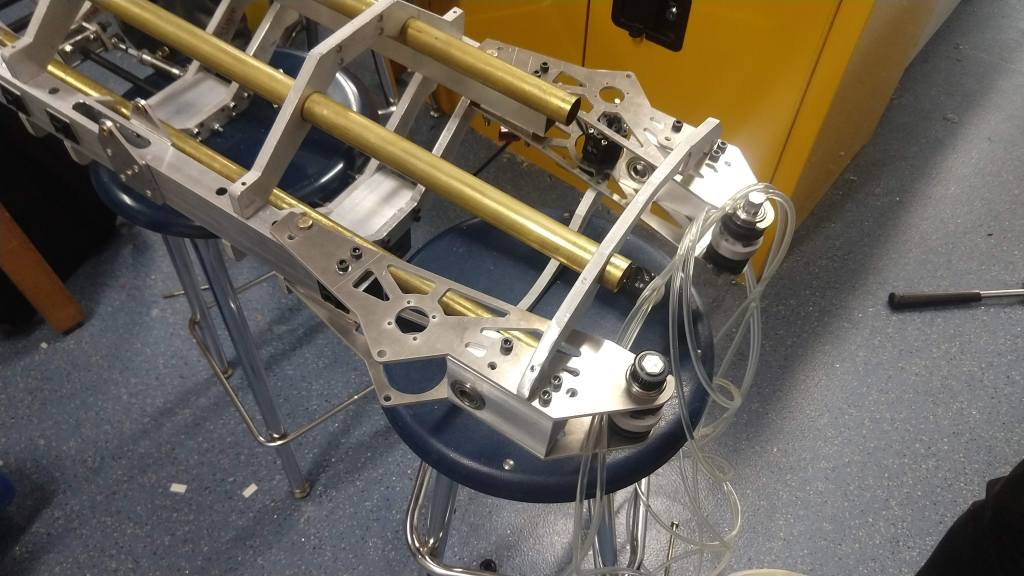
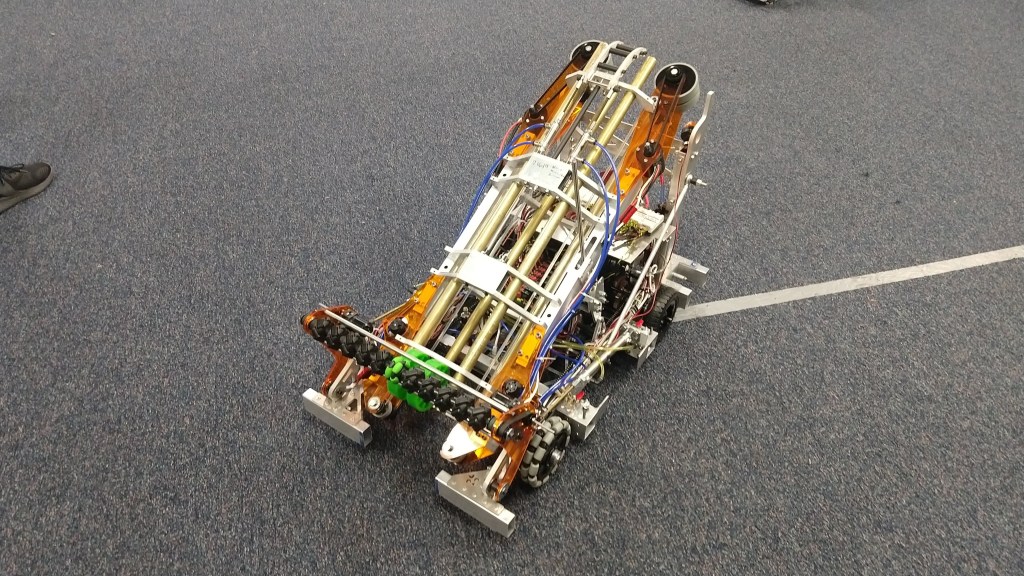
Pictures of how the robot looks with the tube on. It is being held in position by just a random hard-stop we found so this is neither the starting, minimum, or maximum position.
Here you can see the back upright beams we attached as well as the pneumatic piston (one of two) (pictured right) that will extend the climber up.
In addition I just wanted to point out something that I forgot to on a previous blog post but just noticed again today. In the past we’ve had problems with bumper attachment and the time it takes to switch bumpers. This year we’ve gotten some new clamps that should be easy and quick to operate as well as sturdy and durable. This will make our bumper switch time drastically lower as well as ensure that the bumpers stay secure. These can be adjusted as well so that the clamping force is lesser or greater (will have to be tested with the bumpers).
Open and closed positions for the clamp on one of the four positions we have for bumper brackets.